Submitting the final copy of the thesis or dissertation for partial fulfillment of the requirements of a graduate degree is a multi-part process. For all master’s and doctoral students, the submission process includes submitting a final draft (approved by the Graduate School) to Vireo in PDF format.
The process of submitting to Vireo will be available on Friday, January 30. This page is updated in anticipation of that launch.
Submitting to Vireo
Students are required to upload their drafts to Vireo, the submission and review platform for theses and dissertations. Accepted documents in Vireo will be published in DSpace. DSpace is the digital repository housing the collection of official copies of theses and dissertations accepted by the Graduate School.
This draft is submitted to the Coordinator of Student Services to ensure that the draft is free of formatting errors. Emailed draft submissions are not accepted. All drafts must be submitted through Vireo.
Before submitting the work to Vireo, be sure to review the Graduate School’s Guide to the Preparation of Theses and Dissertations to better understand the formatting requirements expected by the Graduate School.
Initial Draft Submission
Use the following instructions to submit a preliminary draft of a thesis or dissertation for review by the Coordinator for Student Services.
Step 1: Log in and start submission
After logging into Vireo with NetID and password, click the “Start your submission” button to begin the process.

Step 2: Select the university
On the next page, click on the gray box with blue text in the upper left corner that reads “The University of Tennessee at Knoxville.”

Step 3: Select “Theses and Dissertations”
From the options provided, select “Theses and Dissertations.” If you have an approved Classified Research Exemption, there are separate instructions. These instructions are for students who do not have a Classified Research Exemption. Embargos are not the same as Classified Research Exemptions.

Step 4: Begin the thesis/dissertation submission process
Once “Theses and Dissertations” has been selected, click on the blue “Start Theses and Dissertations Submission” button.

Step 5: Fill out the Personal Information page
The next page displays the first of four sections to the submission process, the “Personal Information” page. Each step of the process is shown by the highlighted buttons at the top of the page.
Fill out all fields with asterisks indicating they are required.

Step 6: Fill out the Document Information page
Complete all required fields describing the document representing your thesis/dissertation.
Step 7: Select your file to upload
On the File Upload page, you will see two places to select documents. You will need one manuscript document, and have the option to add supplemental supporting documents. The supplemental files are optional and are not required.

Step 8: Upload your file
Once the file has been selected, the name of the file will appear to the right of the selection area, along with a button titled “Upload.” Your file is not uploaded until you click the Upload button.

Step 9: Confirm your file upload
Once “Upload” has been selected and the file has been uploaded, the “Upload” button will disappear, and the file icon will remain with the final filename. Once the file is uploaded click “Continue to Deposit License Agreement” to proceed.

Step 10: Confirm the license agreement
Review the Deposit License Agreement statement and click the box “By checking here, you agree to the above license in its entirety.” You can then choose whether or not to agree to publish in ProQuest separately from in the UT records. This second agreement is optional. Once you have made your selections for this page, click “Continue to Review” at the bottom.
Step 11: Review your information and submit
On the Confirm and Submit page, review all information you have entered and make any edits on previous pages as needed. When everything is correct, click the blue “Confirm and Submit” button.

Step 12: Check the confirmation page
There will be a final confirmation page to indicate that your submission is complete. This will also be followed by a confirmation email.

Submitting a Revised Draft
These instructions are for submitting a revision of an existing draft. If you have not already submitted an initial draft, please use the Initial Draft instructions instead.
Step 1: Log in from feedback email
When you have received feedback, you will get an email from thesis@utk.edu with comments and a link to your individual document to make revisions. Use that link and log in with your NetID and password.

Step 2: Start the revision process
After logging in, you will once again be taken to the main landing page for Vireo. This time, the button at the bottom will say “Correct your submission.”

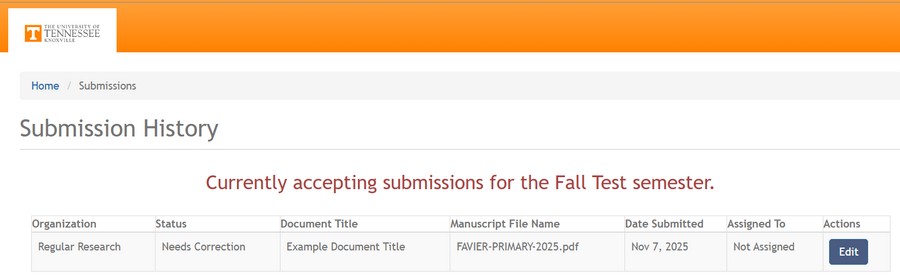
Step 3: Choose the submission to edit
From the list of submissions provided in the Submission History, select the edit button for the submission you want to revise.
Step 4: Jump to the manuscript replacement
On the Submission View, there will be a red dialog titled Current Submission State. Do not click “Corrections Completed” until you have uploaded your revised draft. Click the message to “jump down” to replace the manuscript first. You can minimize this or expand it again using the small, bracketed minus [-] or plus [+] buttons in the right corner of the red message box.

Step 5: Prepare to replace the existing submission
Click the white “Replace Manuscript” button on the right:

Step 6: Select the file to upload
Either drag the file to the manuscript upload area, or click in the area to select the file to upload.

Step 7: Upload your file
Once the file has been selected, the name of the file will appear to the right of the selection area, along with a button titled “Upload.” Your file is not uploaded until you click the Upload button.
Step 8: Confirm your file upload
Once “Upload” has been selected and the file has been uploaded, the “Upload” button will disappear, and the file icon will remain with the final filename.

Step 9: Confirm that corrections are completed
Reopen the red message box if you have minimized it, and click the “Corrections Completed” button. You will get a warning before it uploads to be sure you have made the changes.

Step 10: Review the confirmation page
A “Submission Corrected” page will appear, with a message indicating that your submission has been revised.

Step 11: Check the confirmation page
Although there will be no email confirmation you can check the submission status by clicking “View submission status” to return to the Submission History page. You may have to refresh the page to see the “Corrections Received” status.

Step 12: Repeat as necessary
You will repeat this process with feedback and revisions until you receive an approved email from thesis@utk.edu.
Committee Approval
All committee members must verify their approval of the final thesis or dissertation by signing the thesis/dissertation approval form. The completed form must be submitted to thesis@utk.edu no later than the acceptance deadline for the term.
Survey of Earned Doctorates
For doctoral students, there is a third part of the process, which is to provide the certificate of completion of the Survey of Earned Doctorates to the Graduate School. After completion, a certificate will arrive by e-mail. This should be emailed to the Coordinator of Student Services as soon as it arrives. Do not print the form and deliver it in person to the Coordinator of Student Services.